How Much Does Plastic
Extrusion Tooling Cost?
The cost of plastic extrusion tooling can vary significantly from one project to another. A simple profile may require relatively straightforward tooling, while a complex technical profile can require considerably more engineering, machining and development work.
So, what exactly are you paying for when you order an extrusion tool?
The price goes beyond
the physical tool itself.
The total tooling cost usually consists of three main stages.
Tool Design
Engineers develop the tooling concept around the profile geometry, material, tolerances and extrusion process.
Tool Manufacturing
The designed tool moves into machining, finishing and preparation for the first extrusion trial.
Tool Trial
The tool runs on the extrusion line and the resulting profile undergoes dimensional and quality checks.
Trial. Measure. Adjust.
Repeat if necessary.
If the profile does not yet meet the required dimensions or geometry, the tool can undergo further modification followed by another trial.
Understanding this process makes it easier to see why two extrusion tools with seemingly similar dimensions can have very different prices.
What Does the Price of an
Extrusion Tool Include?
An extrusion tool does not simply appear at the end of a machining process. Before manufacturing begins, engineers need to understand how the material will flow through the tool, how the profile will behave during cooling and how the final dimensions will relate to the required specifications.
01
ENGINEERING
Tool Design
From profile drawing to extrusion-ready tooling
+
Tool Design
The first and most important step is tool design.
Before cutting metal, the manufacturer needs to determine how the extrusion tool should produce the required profile.
The engineer needs to account for the way the material flows through the die and how it changes during cooling.
This becomes particularly important with complex profiles containing thin walls, internal cavities, sharp transitions, grooves or different wall thicknesses.
A good extrusion tool starts with a good design. The goal is not simply to reproduce the profile drawing, but to create tooling that can produce the required profile consistently and reliably in real production.
02
PRECISION MACHINING
Tool Manufacturing
Turning the engineering concept into a physical tool
+
Tool Manufacturing
Once the design meets the project requirements, the manufacturer can produce the physical extrusion tool.
Depending on the profile and the required precision, manufacturing may involve several machining and finishing processes.
The tool material needs to withstand the mechanical and thermal conditions of extrusion. The selected material can influence tool life, wear resistance, surface quality, machining time and overall cost.
03
REAL PRODUCTION
Tool Trial
Testing the tool under actual extrusion conditions
+
Tool Trial
After manufacturing, the tool needs to prove itself in the actual extrusion process.
The manufacturer installs the tool on the extrusion line and produces the first profile samples. The team then checks the resulting profile against the required specifications.
Even when the tool design looks correct on a computer and the machining process meets the drawing requirements, the first extrusion trial may reveal areas that need adjustment.
Design → Manufacture → Trial → Adjust if necessary
The goal is not simply to manufacture a tool. The goal is to create tooling that can reliably produce the required profile within specification throughout the production run.
What Happens If the First Trial is Not Prefect?
Ideally, the first trial produces a profile that meets the agreed requirements.
However, this does not always happen.
Extrusion involves several variables, including material behaviour, temperature, pressure, cooling, haul-off speed and shrinkage. These factors can affect the final dimensions and shape of the profile.
If the first trial does not deliver the required result, the manufacturer can modify the tool.
The modification may involve adjustments to specific areas of the die to improve material flow or compensate for dimensional deviations.
After the modification, the manufacturer runs another trial.
The process then follows a simple cycle:
Design → Manufacturing → Trial → Measurement → Modification → Trial
The manufacturer repeats this cycle until the profile reaches the required specification.
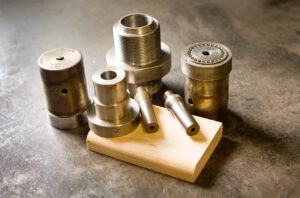
Why Can Tool Modifications Increase the Cost?
Tool modifications require additional engineering, machining and testing. If the first trial does not deliver the required result, the development process continues until the tool produces the required profile.
A modification does not simply mean changing the tool. Before making any adjustment, the manufacturer needs to understand what happened during the trial and identify which area requires improvement.
The process may therefore include analysis, redesign, machining, another trial and dimensional inspection before the final result meets the specification.
Each additional trial adds engineering, machine time and inspection work. The more development cycles a tool requires, the higher the final tooling cost can become.
What Determines the Cost of the Tooling?
The final tooling cost depends on much more than the physical size of the tool. Profile geometry, material, tolerances and production requirements all influence the engineering and manufacturing effort.
Profile Complexity
A simple solid profile generally requires less complex tooling than a multi-cavity or highly technical profile with intricate geometry.
Profile Size
Larger profiles can require larger tools, more material and longer machining times.
Material
Different plastics behave differently during extrusion. The material affects tool design, material flow and the production process.
Dimensional Tolerances
Tighter tolerances usually require more precise engineering, machining and process control.
Tool Construction
The construction and design of the tool influence manufacturing time, performance and expected tool life.
Production Volume
High-volume production may justify different tool materials and construction than a small development project.
Number of Trials
Additional modifications and trials can increase the final cost, depending on the project scope and agreement.
The initial tooling price may cover standard design, manufacturing and the first trial. If the tool requires further development, additional engineering, modifications and trials can affect the final project cost.
A Simple Example
A typical extrusion tooling project can follow the sequence below, from the initial design to final approval.
01
Step 1
Design
+
Design
The customer provides the profile drawing, material and required tolerances. The tooling engineer designs the extrusion tool around these requirements.
02
Step 2
Manufacturing
+
Manufacturing
The tool manufacturer machines the die according to the approved design. The manufacturing process can include CNC machining, milling, drilling, EDM, grinding and finishing.
03
Step 3
First Trial
+
First Trial
The tool runs on the extrusion line and produces the first samples. This trial provides the first real indication of how the tool performs under production conditions.
04
Step 4
Measurement
+
Measurement
The manufacturer checks the critical dimensions of the extruded profile and compares them with the agreed specification. Depending on the application, this can include
So, How Much Does Plastic Extrusion Tooling Cost?
There is no single price for an extrusion tool.
As a general indication, simple tooling may start at several hundred euros, while more complex technical extrusion tools can cost several thousand euros or more. Highly complex, large or high-precision tooling can require significantly higher investment.
The final price depends on the specific project rather than simply the physical size of the tool.
A simple profile with relaxed tolerances may require relatively little development work.
A complex engineering profile with tight tolerances, multiple cavities and demanding material requirements may require considerably more engineering, machining and trial work.
For this reason, the most useful way to request a tooling quotation is to provide the manufacturer with as much technical information as possible.
What Do We Need to Quote an Extrusion Tool?
To prepare a meaningful tooling quotation, the manufacturer normally needs:
- A profile drawing
- The selected material
- Critical dimensions and tolerances
- Profile dimensions
- Expected production volume
- Surface requirements
- Where available, information about the extrusion line
The more complete the information, the more accurately the manufacturer can assess the tooling requirements.
The Tool Is Only Part of the Investment
When planning a new extrusion project, it is important to look beyond the price of the die itself.
Depending on the profile, the complete tooling solution may also require:
- Calibration tooling
- Cooling equipment
- Sizing equipment
- Haul-off equipment
- Cutting equipment
- Additional production-line components
These elements help turn the extrusion die into a complete production process capable of delivering a stable and repeatable product.
Conclusion
The price of plastic extrusion tooling reflects much more than the cost of machining a piece of metal.
It includes engineering, tool design, manufacturing, testing and, when necessary, further development work.
The ideal project reaches the required result after the first tool trial. However, complex extrusion profiles may require one or more modifications before they consistently meet the agreed specifications.
The goal is not simply to manufacture an extrusion tool.
The goal is to develop tooling that can reliably produce the required profile, within specification, throughout the production run.
 English (UK) English (UK) English (UK)
  Slovenčina
  Deutsch
  Magyar
  Français
  Čeština
  Slovenščina
  Hrvatski
  Nederlands English (UK) English (UK) English (UK) Slovenčina
Deutsch
Magyar
Français
Čeština
Slovenščina
Hrvatski
Nederlands
Nederlands English (UK) English (UK) English (UK) Slovenčina
Deutsch
Magyar
Français
Čeština
Slovenščina
Hrvatski
Nederlands